The information and instructions provided below refer to working from the online version of OneDrive for Office 365.
Share documents or folders in Office 365
The documents and folders you store in OneDrive for Business are private until you decide to share them. Similarly, in a team site library, you may want to share specific documents or folders with people who don't otherwise have access to the site. When you share documents and folders, you can decide whether to let people edit or just view them.
Note
You may also be able share documents with external users (people not on your network) by inviting them as "Guests," or by creating and posting guest links. For details, see Share sites or documents with people outside your organization.
Table of Contents
Share a document by using Get a link
You can share a link to a document that others can also share by using Get a link. Get a link is available only for individual files, but it's the easiest way to share documents with everyone in your organization or to share with people externally (as long as external sharing is enabled for your sites).
- Go to OneDrive for Business or the site library that has the document you want to share.
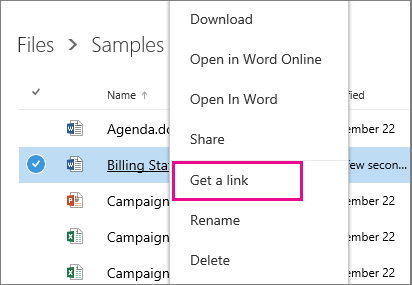
- Right-click the document you want to share, and then select Get a link.
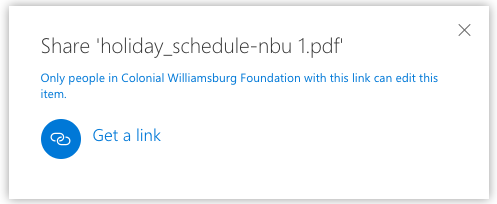
3. Click on "Get a link"
Note
Once you click on "Get a link" the file is set to "Shared" status. For more information on changing permissions refer to the "Stop sharing a document or folder" section below.
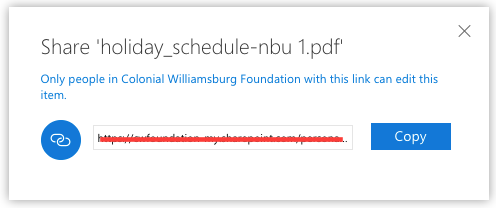
4. Click on "Copy" to copy the text to the clipboard. You can then paste it in to an email or other message to share the document.
Share a document or folder by inviting people
To share folders or to share documents when "Get a link" isn't available, you can invite people.
- Go to OneDrive for Business or the site library that has the document or folder you want to share.
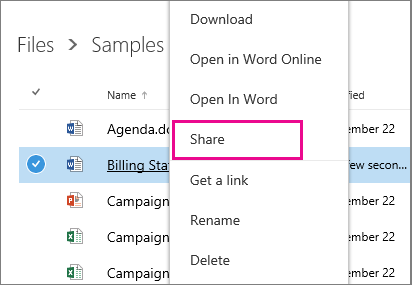
- Right-click the file you want to share, and then select Share.
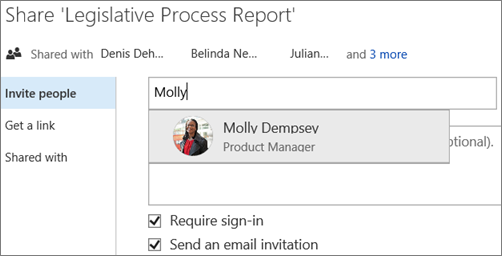
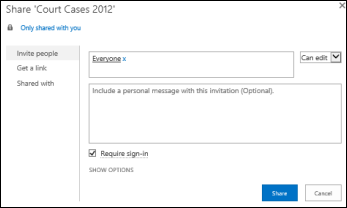
- In the Share dialog box on the Invite people tab, type names or email addresses of people you want to share the document or folder with.
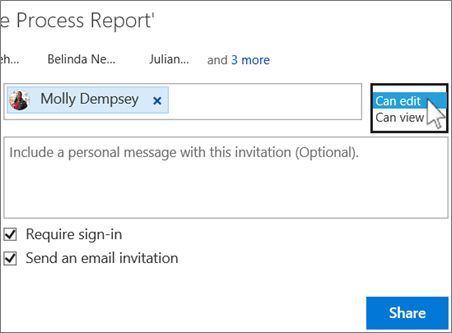
- Select a permission setting, such as Can edit.
- If you want, type a message to be included with an email that's sent to all invitees. The email includes a link to the shared document.
- If you don't want to send an email, uncheck Send an email invitation.
- Click Share.
More information in this article
The links below are to Microsoft support documents. For security purposes ITS has decided to restrict certain functionality that may mentioned in the links below. For more information contact Information Technology Services help desk.
- Learn more about file storage and sharing in Office 365
- Share documents with a limited set of people
- See who you're sharing a document with
- Stop sharing a document or folder
- Other ways to share a document or folder with everyone in your organization
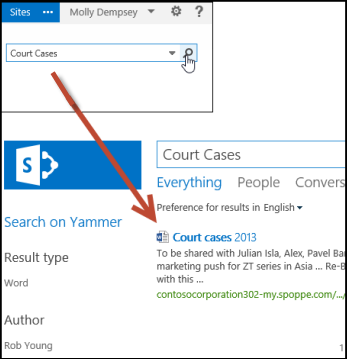
- How do people find documents I've shared with everyone?
Learn more about file storage and sharing in Office 365
For recommendations on where to store files in Office 365 and how to set things up, see Set up Office 365 file storage and sharing.
Share documents with a limited set of people
To share multiple documents with a selection of people, you have a couple of options:
- Create a group (if you're in Office 365 and Groups are enabled)
- Create a folder and place documents in that folder as you create them
Create a group (if you're in Office 365 and Groups are enabled)
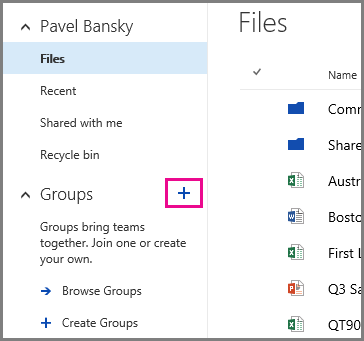
- In the navigation, next to Groups, click the plus sign (+).
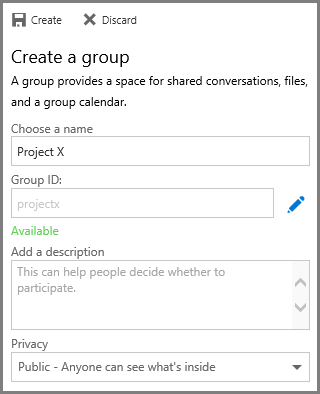
- Type a name for the group, set the Privacy to Public or Private.
- Click Create.
- Add members to the group.
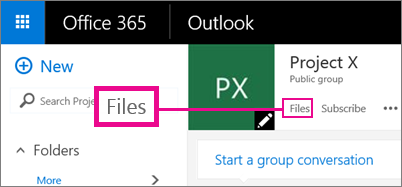
- In your group, near the top of the page, click Files to go to the group OneDrive.
- Drag files onto the page or click Upload.
Create a folder and place documents in that folder as you create them
- To create a folder, click New > Folder. You can share the folder with people as you create it.
- If you didn't already share the folder while creating it, share the folder by inviting people.
- Upload or drag files to the folder.
See who you're sharing a document or folder with
- Right-click the document and then click Share.
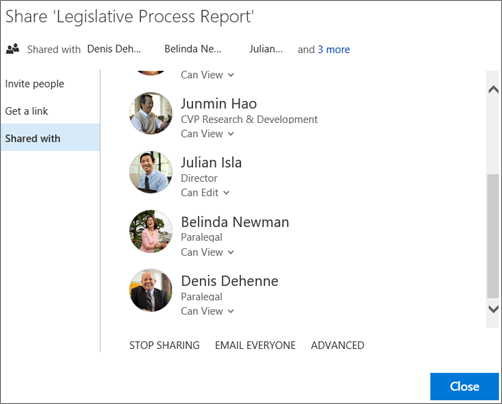
- In the Share dialog box, click Shared with.
- If you're sharing with more people than whose names will fit on the card, select the more link at the end of the list of names. You can scroll the list to see all names.
Tips If the library you're working in has a Sharing column, you can select the people icon to open the Share dialog box.
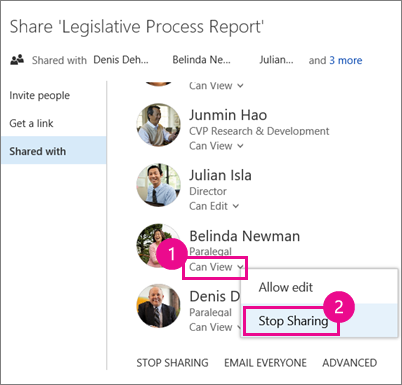
Stop sharing a document or folder
To make a document or folder private again, you can stop sharing it.
Note
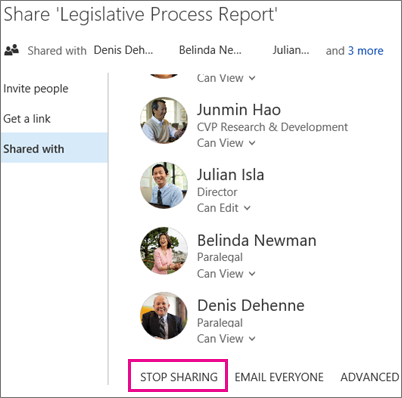
The STOP SHARING link that removes all users at once is not available for folders. To quickly stop sharing a folder with many users or groups, try this: Click ADVANCED, use the check boxes to select the users or groups you want to remove, and then click Remove User Permissions.
Other ways to share a document or folder with everyone in your organization
In OneDrive for Business, there are more ways to share a document with everyone:
- Use the Share dialog box. Follow the same steps described above for share a document or folder, but type Everyone in the Invite People box.
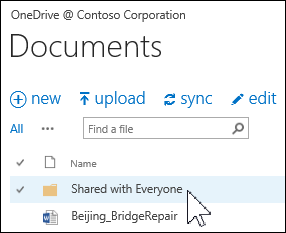
- Create a "Shared with Everyone" folder (or one with a similar name) and place documents in that folder as you create them. To create a folder, click New > Folder. You can share the folder with people as you create it.
Note
Note You may already have a Shared with Everyone folder that was provisioned for you.
The Share dialog box lets you select "Everyone except external users." If your organization allows external sharing, sharing with "Everyone" includes external users: people outside of your organization who have previously been invited to share documents as guests, either by you or by others in your organization.
If you have a Shared with Everyone folder that was provisioned for you, everyone gets permission to edit documents that you put in the Shared with Everyone folder, unless you change the permission setting or unless your OneDrive for Business was created before June 2014. If your OneDrive for Business was created before that date, the Shared with Everyone folder started with View-only permissions. You can change the permission setting any time by following the instructions for sharing a folder earlier in this article.

