

As an owner of an email distribution list, one can modify group membership. These instructions apply to distribution lists in the global address book, to lists that have their own @cwf.org email address; not contact groups in your own address book.
Please note: If a distribution list has been hidden from the global address book, you will not be able to view membership of the list.
TO VIEW MEMBERS OF A LIST
- Open Outlook desktop client
- On the ribbon of the Mail tab, click on the Address Book button. The Address Book should open in a new window.

- From the Address Book list, select Global Address List.
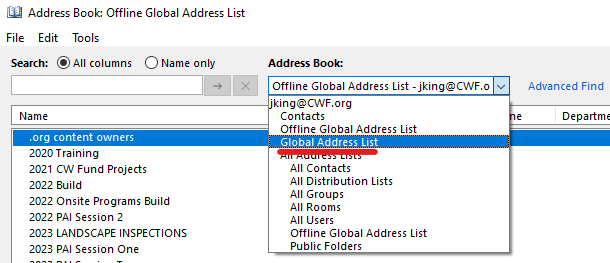
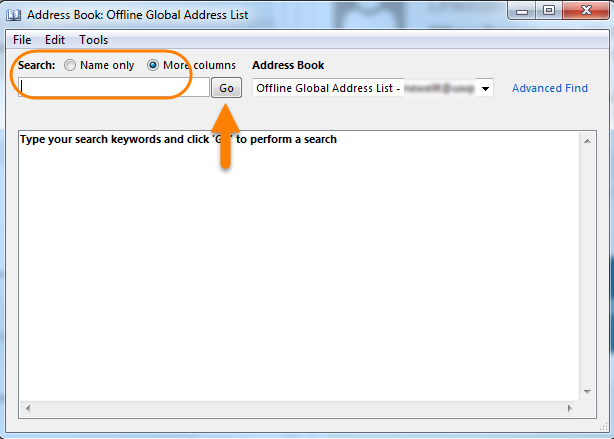
- In the Search field, type the name or email address of the list you own and want to view. Click Go.
6. Select a distribution list from the search results.
7. Double-click on the list to view membership and other properties of the list.
TO MODIFY MEMBERS OF A LIST
- Follow the instructions above to view the current membership of the list. If your list does not appear in the Global Address Book, it may be hidden and you will not be able to edit membership yourself. Please contact the IT Help Desk to either change visibility of the list or modify membership on your behalf.
- Click on the Modify Members... button of the list properties window. A Contact Group Membership window should appear.

TO REMOVE MEMBERS FROM A LIST
- Select the person's name from the Members list.
- Click Remove.
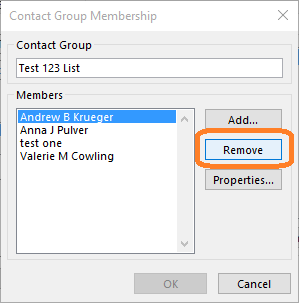
3. Repeat the process for any other people that should be removed from the list. Then, click OK to save changes.
TO ADD MEMBERS TO A LIST
1. Click on the Add... button.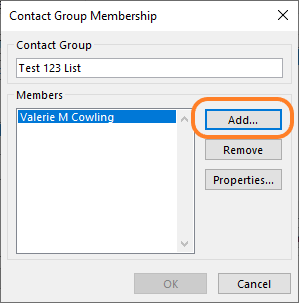
2. On the Add Users window that appears, use the Search feature to find people in the Global Address List or from your Contacts that you want to add to the list.
3. From the results, select the person you want to add and click the Add -> button
4. When you have finished selecting members, click OK.
5. Verify that the new members have been added by reviewing the Members list.
6. Click OK to apply changes to list membership.